Branding for Student Portal
Branding for the Student Portal entails designing the header banner and the Student Welcome Page that displays when a student first logs into Prosperity. The student welcome page can be totally customized and is simply an HTML page. Everything below the horizontal menu is part of the welcome page. You may submit these files as HTML graphics directly to your Project Consultant.
Student Welcome Page
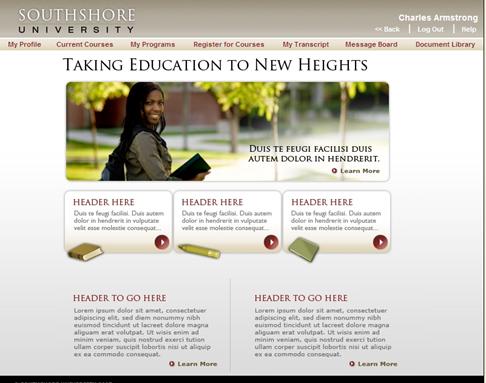
The student welcome page is the page that displays when a student first logs into Prosperity. This page can be totally customized and is simply an html page. Everything below the horizontal menu is part of the welcome page. You may submit these files as html/graphics directly to your Project Consultant. The default page width is 800 pixels.
Figure 3: Welcome Page
Header / Banner Graphics
The header banner is typically 80 pixels high and 800 pixels wide. This can be adjusted as needed. Your graphic should leave room on the right hand side for Prosperity to overlay links as needed.
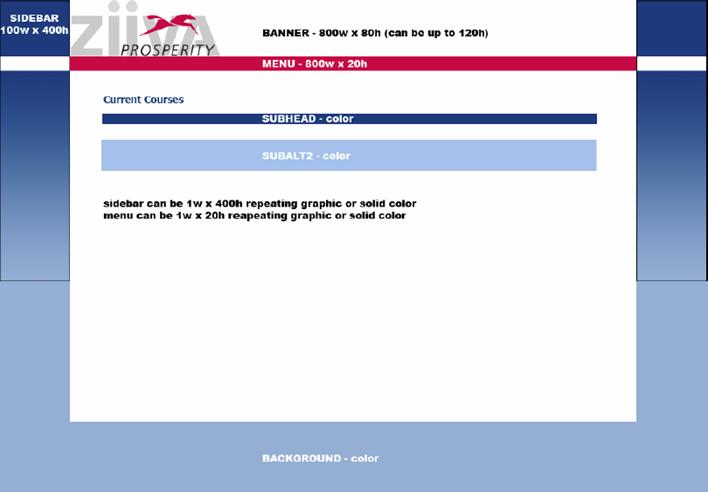
Figure 4: Student Portal Banner Template
Send to your project consultant:
§ Header/banner graphic
§ Desired background color (rgb or hex)
§ Desired menu color (rgb or hex)
§ Desired subhead color (rgb or hex)
§ Desired subalt2 color (rgb or hex)
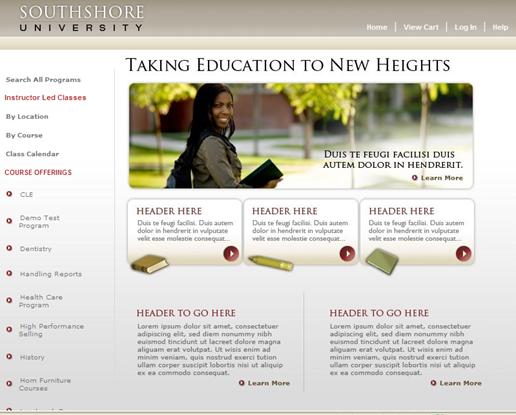
Shopping Cart Home page
This page is applicable only to clients using Prosperity’s shopping cart. The shopping cart home page is the splash page for the shopping cart. It is totally customizable and may include graphics as well as multi-media such as flash, video, etc… This file must be called welcome.htm. The default welcome pages are 650 pixels wide. The total student portal width defaults to 800 pixels wide. This can be adjusted as needed. You will need to work with your Project Consultant to review and setup these configurations.

Certificate(s)
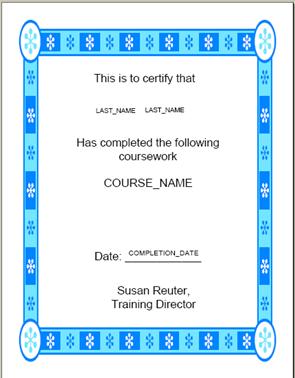
Completion certificates are available at the course level and the program level. A certificate is really just a pdf file with some form fields added to it. Most clients will send Ziiva a powerpoint or other office document that has the design of the certificate (see example below). Ziiva then converts to a pdf format and puts the appropriate form fields onto the pdf file. You may have different certificates that are used for different courses if you desire, although most clients typically have only one certificate that is used for all courses. You will need to work with your Project Consultant to review and setup these configurations.
Any data in the Prosperity database can be put onto the certificate. Typical data fields are:
first name
last name
course name
completion date
Please contact your Project Consultant to discuss any particular fields or customizations you would like to your certificate.
Certificate Example:


 Student Welcome
Page